
This is the basic picture that I decided to use. Some minor tweaks and we'd be in business.

We use a light table to transfer images onto the fabric. Basically, that means that if the image is clearly outlined, and the material is a light color (translucent), we can see the image through the material on the light table, and simply trace it onto the material with a sharpie. That's why we usually choose light-colored flaps for prize bags and intense custom stock bags. It's easier to initially transfer the image. However, since the artwork itself was so dark and full of shadows, I made a crude outline first so i could then use the outline to cut the basic parts. The cape and helmet were different pieces, while I added a cog image and a crown in gold cordura. Whenever we do custom work, every different colored region is a layer of cordura that must be drawn and cut out in this fashion before we begin the stitching process.

Most of our lettering is done on the computer first. I found this font, which I thought went along well with the theme of the bag, and printed it out. However, I felt that since the actual flap was going to be light gray, the lettering would be better as a dark color. "Might as well do black"....in cases like this we have an alternate process for the image transfer.
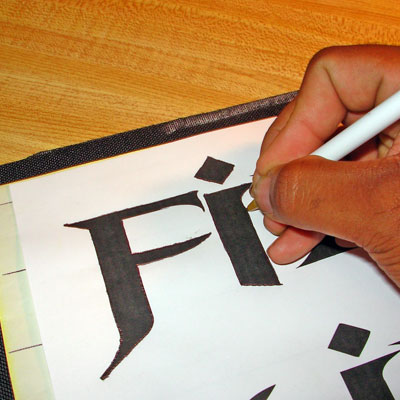
Since it's nearly impossible to see the printed letters through black cordura on the light table, I had to use transfer paper. Basically, it's a sheet of wax paper with a layer of chalk on one side. You place it on top of the cordura, place your letters on top of that, and draw your outlines - firmly.
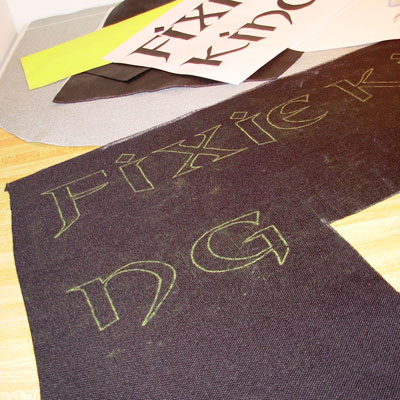
This is what you get when you do it right. It's really not hard to do, but it can be very frustrating when you're doing some really intricate stuff (ie. when I do an order for a customer and it's a very detailed image in dark colors). Especially when you forget to draw one line or one part, and you have to figure out the exact placement of the original over the cordura and transfer paper so you can fill in that last part.

OK, so I skipped a bunch of parts...to get to this point, I'd cut everything out (very tedious process that sometimes takes longer than it does to stitch the stuff on in the end), glued it down, and drawn all the detail stuff. This includes small things like the musculature and other areas that were too thin to actually cut out material for (eyes, teeth, etc.). These are done with stitching only, and in a lot of cases require the stitcher to vary the stitch length dynamically to go along with the area to be filled. That means that while you're peering at the needle to see what you're doing, you're also manipulating the cordura with one hand, while regulating the stitch width lever with the other. And feathering the pedal to keep a controllable stitch speed, while raising/lowering the foot lift lever with the knee of the same leg so you can actually rotate everything. Takes practice.
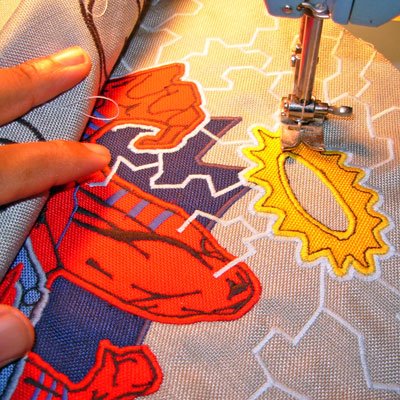
At this point, I'd finished the basic outline. I decide to do a thin inner outline in black, since the details were black and might look a little strange connecting to a red outline. I drew lightning around everything and stitched over the lines i'd drawn. In this pic you can see the window that we're dealing with: that little horizontal slot that the needle is dipping down into. That's the area we are looking at at any given time to make sure everything is on point. In case you can't tell, it's roughly a half-inch wide. However, that's the MAXIMUM stitch width. Most of our custom work is done using a stitch width of about 1/8". Chew on that for a little bit.

When it's all said and done, you get something along these lines.

For more pics of the NACCC '06 prize bags, and a whole bunch of custom stuff in general, check out the website
0 comments:
Post a Comment